Mon - Sat 7:00 am to 7:00 pm
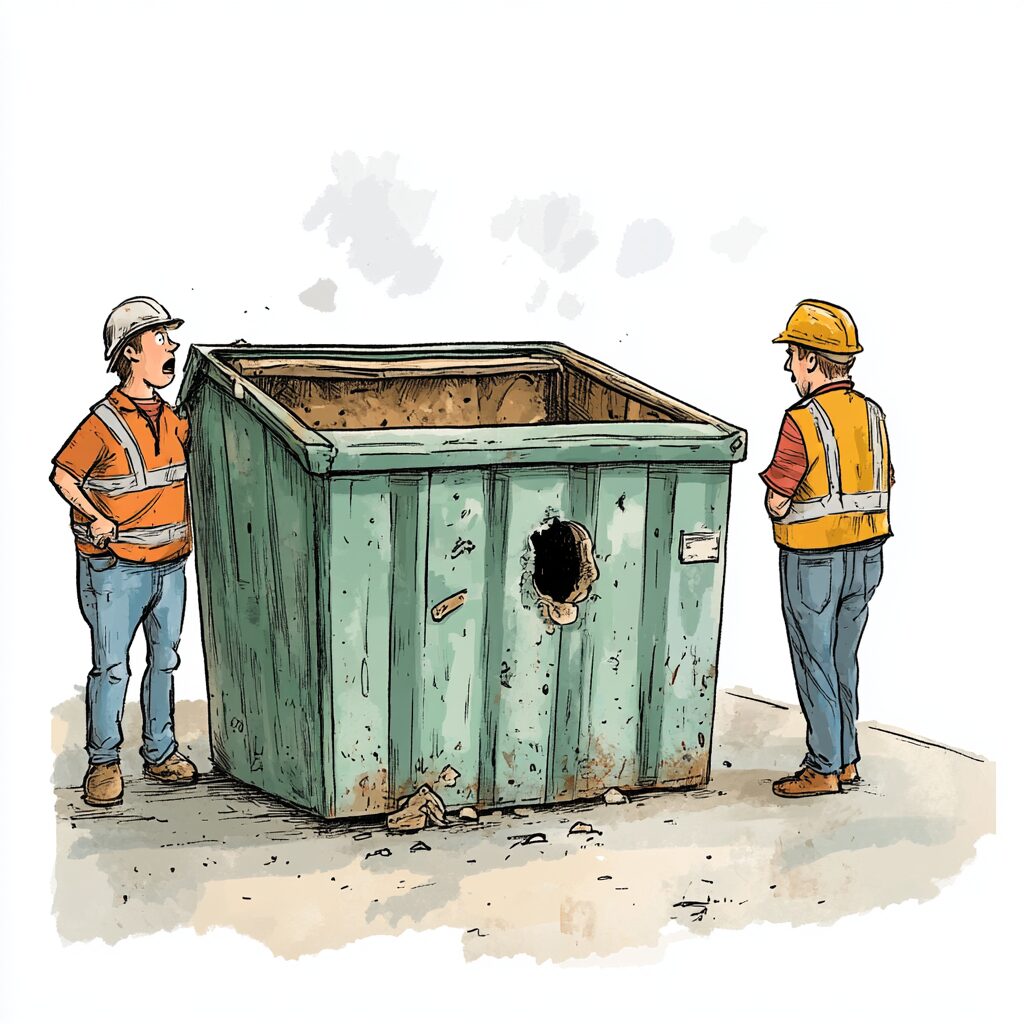
How to Spot Dumpster Wear
Learning how to spot dumpster wear saves construction managers and homeowners from unexpected delays, potential safety hazards, and surprise fees during projects.
Like checking a rental car for dents before driving away, inspecting your container upon delivery takes just minutes but can prevent major headaches down the road. Regular inspections throughout your rental period remain equally crucial, as heavy loads and changing weather conditions can create new issues even in containers that arrived in perfect condition.
At Prime Dumpster, we’ve created a guide explaining simple checks anyone can do. We’ll cover exterior dents, door hinges, floor integrity, and even unusual noises. You’ll learn why a quick inspection matters (hint: avoiding surprise fees and messy cleanups). No need to channel your inner dumpster-diving enthusiast—just practical tips to save time and headaches.
5 Steps to Spotting Dumpster Trouble
Did a rented dumpster just get delivered to your property? Here are the five most important steps to take right now:
- Check the Floor First – Run your gloved hand along the container’s bottom surface, feeling for cracks, holes or unusual dips that could lead to leaks or structural failure. Small cracks often appear near corners first, so pay special attention to these high-stress areas during each inspection.
- Test Door Hinges and Latches – Open and close all doors completely three times, listening for squeaking, grinding or resistance that signals developing problems. Properly functioning doors should move smoothly and latch securely without excessive force, as sticky mechanisms often precede complete failures.
- Examine Side Panels for Bulges – Stand at each corner of your dumpster and look down the sides for any warping or bulging metal, which indicates structural weakness from overloading or impact damage. These subtle deformations can quickly worsen under heavy loads, potentially creating hazardous conditions.
- Listen While Loading – Pay attention to unusual sounds when adding debris, as new creaks, pops or metallic groans often reveal developing structural issues before they become visible. Different noises signal different problems – high-pitched squeals typically indicate hinge issues while deep metallic groans suggest frame stress.
- Check Drainage After Rain – Observe how water exits the container after rainfall, as puddles or standing water indicate floor depressions or clogged drainage that can accelerate rust and add unnecessary weight. Proper drainage prevents water-related complications that compromise container integrity and potentially damage your property.
Now let’s take a closer look at how to spot, prevent and handle any dumpster integrity issues:
A Quick Overview of Rented Roll Off Dumpsters
Choosing the right container isn’t just about size—it’s about matching your project’s needs. Let’s break down what you’re working with before you sign that rental agreement.
Overview of Dumpster Types and Sizes
Roll-off containers come in five standard sizes: 10-, 15-, 20-, 30-, and 40-yard models. A 10-yard unit holds about three pickup trucks of debris—ideal for bathroom remodels. The 40-yard giant? Perfect for roofing jobs or large-scale cleanouts.
- 10-yard: Small renovations, garage cleanouts
- 20-yard: Flooring projects, mid-sized construction
- 40-yard: Commercial sites, major demolition
Common Uses and Rental Considerations
Placement matters. Ensure there’s space for delivery trucks to maneuver—no one wants a container stuck in mud or blocking traffic. Check local rules about permits, especially for street placements.
Inspecting hinges and doors beats dumpster diving for surprises later. Look for smooth operation and intact latches. And please, leave the actual diving for treasure hunters—your shoes (and dignity) will thank you.
Reasons to Inspect Your Dumpster for Wear
Your worksite’s safety hinges on details most overlook—like the condition of your rented equipment. A quick check takes minutes but prevents messy surprises. Let’s explore why this step matters more than you might think.
Safety and Maintenance Concerns
Damaged containers create risks faster than you can say “throw away.” Sharp edges or bent doors might snag clothing or scratch skin. Worse, compromised walls could collapse under heavy loads, turning a tidy area into a hazard zone.
Leaks rank high on the trouble list. A cracked floor might seem harmless until rainwater mixes with debris, creating a sludge puddle. Imagine stepping into that while wearing your favorite shoes. Not exactly a good idea.
- Check for rust streaks or warped metal—early signs of structural weakness
- Test door hinges: Stiff movement means trouble ahead
- Look for uneven surfaces that could tip materials
Even trusted rental companies face wear over time. Regular inspections catch small issues before they become costly repairs. Think of it like brushing your teeth—skip it once, and nobody notices. Skip it a lot, and you’ll regret it.
Make this part of your routine. A five-minute walk-around ensures your site stays safe and functional. After all, nobody wants their project delayed because they ignored a rusty corner.
Identifying Exterior Damage on Roll Off Dumpsters
Think of your rented container like a used car—its exterior tells stories. A quick walk-around helps you catch issues before they escalate.
Scratches, Dents, and Corrosion
Surface flaws aren’t just cosmetic. Deep scratches expose metal to rust, while dents weaken structural integrity. Imagine finding a dent the size of a basketball—would you trust it to hold heavy debris? Probably not a great idea.
| Damage Type | What to Check | Red Flags |
| Scratches | Edges, corners | Exposed metal or peeling paint |
| Dents | Side panels, doors | Bulges deeper than 2 inches |
| Corrosion | Base, hinges | Orange streaks or flaky patches |
Rust acts like termites for metal. If you spot corrosion near door hinges, it’s time to call your rental company. Dumpsters in coastal areas are particularly susceptible to rust-related issues as salt air accelerates decay.
Don’t forget to inspect the undercarriage. Mud buildup or bent rollers often go unnoticed until something breaks. Keep your project on track by catching these issues early. After all, nobody wants to find anything unpleasant mid-job.
Spotting Mechanical and Moving Component Issues
Moving parts can make or break your project’s flow—literally. A faulty hinge or stuck roller turns simple tasks into headaches faster than you can say “maintenance check.” Let’s focus on the pieces that keep your container functional.
Hinges, Latches, and Rollers
Secure hinges prevent doors from swinging open unexpectedly. Test each latch by opening and closing it three times. Smooth motion means you’re good. Stiffness? That’s trouble waiting to happen.
| Component | Inspection Steps | Warning Signs |
| Hinges | Check for rust, wobble | Grinding noise or resistance |
| Latches | Test locking mechanism | Bent metal or loose bolts |
| Rollers | Spin each wheel | Uneven rotation, cracks |
Worn rollers cause containers to tilt during loading. Imagine a pair of sneakers with one flat sole—that’s a dumpster with bad wheels. You’ll find way more frustration than debris.
Stuck latches often need just a squirt of lubricant. Grab a can from your toolbox and try find something simple first. Boxes help stabilize contents if rollers wobble temporarily.
Grease won’t fix everything, but it might buy you time. If hinges screech like a startled cat, call your rental company. Some fixes require pro tools—no shame in asking for backup.
Assessing Dumpster Floor and Drainage Problems
Your container’s floor works harder than an office intern during tax season—and deserves just as much attention. While diving for treasures might sound adventurous, spotting floor flaws keeps your site cleaner and safer. Let’s break down what separates a reliable base from a potential disaster.
Signs of Cracking and Poor Drainage
Start with the obvious: hairline cracks near corners or warped surfaces. These often hide under debris like discarded furniture or construction materials. One contractor’s log noted finding a 12-inch crack concealed beneath old carpet rolls—a ticking time bomb for leaks.
Clogged drains turn containers into swamps. Stagnant water breeds mold and adds weight, straining walls. Look for rust trails around drain holes or puddles that linger after rain. A maintenance crew in Florida once shared how a blocked drain caused 200 gallons of rainwater to seep into a client’s landscaping mulch. Not exactly free stuff you’d want.
- Run a gloved hand along the base—rough patches signal corrosion
- Shine a flashlight across the floor: uneven shadows reveal dips
- Document issues with photos—most companies appreciate a heads-up
Found something concerning? Let your rental provider know ASAP. One contractor avoided fines by flagging a cracked floor before loading hazardous materials. Smart move—like catching a typo in an email before hitting “send.”
How to Spot Dumpster Wear: Signs to Watch For
Visual clues hide in plain sight—if you know where to look. While diving into debris isn’t recommended, scanning surfaces takes less effort than untangling holiday lights. Let’s uncover what your eyes might miss at first glance.
Visual Indicators of Structural Wear
Seasoned inspectors often spot these red flags:
- Faded paint: Sun exposure weakens protective coatings, inviting rust. Look for chalky textures or uneven color patches
- Misaligned panels: Gaps wider than a credit card suggest frame warping from heavy impacts
- Rust streaks: Orange trails near seams signal internal corrosion—like seeing termite mud tubes on a house
- Bowed walls: Curved surfaces indicate stress fractures. Imagine pushing against a soda can—it’ll dent before collapsing
One contractor shared how a slightly tilted door led them to discover bent hinges beneath peeling paint. A small observation prevented a load shift that could’ve damaged nearby equipment.
Create a checklist using your phone’s notes app. Include items like:
- Document paint condition with time-stamped photos
- Measure panel gaps monthly
- Note clothing snags on rough edges—fabric doesn’t lie
Subtle signs often escalate. A Florida crew once ignored hairline cracks near drain holes, only to find way too much water pooling after a storm. Now they bring flashlights to every inspection.
“If you find anything questionable about your dumpster, snap pictures and send them immediately to your rental provider. It’s always easier to swap units early than handle a mid-project crisis,” recommends a Prime Dumpster Pro
Potential Causes of Dumpster Damage
Containers face enemies on two fronts: Mother Nature’s mood swings and human error. Whether it’s a coastal storm or an overzealous forklift operator, damage often starts long before you notice peeling paint or wobbly wheels.
Environmental Factors and Improper Use
Saltwater spray eats through metal faster than a toddler through candy. Construction pros in Florida can find containers with rusted floors after just six months near the ocean. Other environmental troublemakers:
- UV rays fading protective coatings
- Freezing temperatures warping metal seams
- Chemical spills corroding floors
One rental company reported a container’s floor dissolving after someone tossed pool chemicals without proper liners. Not the kind of science experiment you want on-site.
Handling and Transportation Impacts
Ever seen a delivery driver squeeze a container into a tight space? That’s how dents happen. Common handling mishaps include:
- Forklifts nicking side panels
- Overloading beyond weight limits
- Dragging units across uneven terrain
A construction crew once bent a door hinge by forcing oversized lumber into a 10-yard unit. The repair bill cost more than their coffee budget for a month.
Normal wear vs. abuse: Surface scratches from gravel? Expected. A door hanging by one hinge? That’s operator error. Most rental agreements outline this difference—read the fine print before blaming the weather.
Prevent headaches by using plywood sheets under heavy loads and scheduling inspections after extreme weather. When in doubt, snap photos and ask your provider: “Is this your problem or mine?”
Listening for Unusual Noises During Inspections
“A silent dumpster is a happy dumpster – much like a car engine purring smoothly, a well-maintained container shouldn’t announce its presence with clatter or creaks. Unexpected noises function exactly like smoke alarms – ignore them at your peril,” said a Prime Dumpster Pro
Decoding the Symphony of Clanks
Veteran inspectors often share stories about metal groans leading to major discoveries. One diver recalls ignoring a faint rattle only to later find a cracked axle beneath peeling paint. Their advice? Treat every odd sound like a mystery worth solving.
| Sound | Possible Issue | Action Steps |
| High-pitched squeal | Dry hinges or misaligned rollers | Apply lubricant, check alignment |
| Deep metallic groan | Structural stress or bent frame | Stop loading, contact provider |
| Intermittent rattling | Loose bolts or debris inside walls | Inspect fasteners, document findings |
Test doors and rollers by gently rocking the container. A stable unit stays quiet—no creaks or protests. If you hear something resembling a squirrel in a tin can, it’s time to investigate.
Track changes over weeks. New noises often signal developing issues. One crew noticed increasing clatter each time they added roofing materials—turned out a roller bearing was failing.
Remember: Your ears work with your eyes. That rhythmic thump might not be leftover debris—it could mean internal damage. When in doubt, snap photos and let your rental company know immediately. After all, free stuff hidden in containers rarely sounds like trouble… until it does.
Safe DIY Fixes for Minor Dumpster Wear
Got a creaky dumpster door? Don’t panic—most minor issues don’t require a PhD in waste management. With basic tools and safety gear, you can tackle small repairs yourself. Just remember: diving into major fixes without training risks injury or voiding rental agreements. Keep it simple, smart, and safe.
Quick Repairs You Can Attempt
DIY enthusiasts swear by these fast solutions for common problems:
| Repair | Tools Needed | Steps |
| Loose Latch | Adjustable wrench, lubricant | Tighten bolts clockwise. Spray hinge pins if sticky |
| Small Floor Crack | Epoxy sealant, putty knife | Clean area, apply sealant, smooth edges |
| Rust Spot | Wire brush, rust-resistant paint | Scrub affected area. Apply two thin coats |
One contractor shared how a zip tie temporarily secured a wobbly handle until replacement parts arrived. Creativity counts—just don’t turn your container into a duct tape art project.
Tools and Materials for DIY Maintenance
These items come in handy for quick fixes:
| Tool | Purpose | Safety Tip |
| Work gloves | Protect hands from sharp edges | Thicker than your winter mittens |
| Safety goggles | Shield eyes during repairs | No, sunglasses don’t count |
| Multi-bit screwdriver | Adjust various fasteners | Magnetized tips prevent dropped screws |
When to call pros: If repairs involve welding, structural realignment, or mysterious liquids.
When to Call Rental Professionals for Dumpster Repairs
Not every container hiccup needs a hero with a toolbox. Some issues scream “call the pros” louder than a smoke alarm in a library. Knowing when to dial your rental company saves money, time, and your sanity.
| Problem | DIY Fix? | Pro Solution |
| Bent door frame | No | Frame realignment |
| Floor cracks wider than 1/4 inch | No | Structural welding |
| Rusted-through panels | No | Partial replacement |
| Misaligned rollers | Temporary | Axle repair |
Diving into major repairs risks voiding agreements or causing injuries. That “free stuff” mindset? Throw it away when dealing with hydraulic systems or unstable walls.
Next time you try find something worrying, grab your phone first—not a wrench. Photos and detailed notes come in handy when explaining issues. Rental teams appreciate specifics like “dumpster door won’t latch” or “water pools by dumpster near rear wheels.”
Prevention is one of the best methods to prevent dumpster damage. Check out 5 Tips to Protect Your Rented Dumpster.
Inspecting Different Dumpster Sizes (10 to 40 Yards)
Size matters when it comes to container inspections. While a 10-yard unit might take five minutes to scan, its 40-yard cousin demands a marathoner’s stamina. The basics stay consistent—check doors, floors, and structural integrity—but scale changes everything.
Special Considerations for Varying Sizes
Imagine comparing work boots to steel-toe boots. Both protect feet, but one handles heavier loads. Apply that logic to dumpsters:
- Small units (10-20 yards): Focus on door alignment and floor dips. You can circle these in under a minute
- Large units (30-40 yards): Bring a ladder. Check upper seams for rust and ensure latches secure full-height doors
Mobility varies wildly, too. A 40-yard container’s weight distribution requires flat, stable ground. Next time you rent, measure the placement area first. Uneven terrain? Stay away unless you enjoy playing Jenga with industrial equipment.
Tailor your checklist like you’d choose clothing for the weather:
- Compact units: Verify easy access for frequent debris drops
- Massive models: Test drainage across expanded floor space
And please—wear sturdy shoes. Discovering a hidden nail through flimsy soles turns inspection day into a very bad time.
Tips for Routine Dumpster Maintenance Checks
Routine checks are the secret sauce to avoiding surprise meltdowns. Like flossing your teeth, consistency matters more than heroic efforts. A solid schedule catches small issues before they become expensive disasters.
Building Your Inspection Routine
Start simple. Pick two days a month—maybe the first Monday and third Friday—to walk around your unit. Mark these dates in your phone or calendar app. Consistency builds habits faster than New Year’s resolutions.
- Create a checklist: Include door hinges, floor cracks, and drainage areas
- Snap time-stamped photos during each inspection
- Store records in a cloud folder labeled “Container Health”
| Season | Focus Areas | Tools Needed |
| Summer | UV damage, drainage clogs | Flashlight, gloves |
| Winter | Ice buildup, metal contraction | De-icer spray, stiff brush |
After heavy storms or demolition work, do a bonus check. Look for new dents or shifted debris. Sturdy shoes and work clothes make this safer than flip-flops and pajamas.
Document everything. Apps like Evernote or Google Keep come handy for quick notes. If you find something odd, share photos with your rental company immediately. They’ll appreciate the heads-up.
Preventive care beats emergency repairs every time. Treat your container like a reliable coworker—show it some attention, and it’ll return the favor.
Ensuring Safety and Preventing Leaks During Inspections
Safety starts before you even approach the container. Industry pros agree: Proper prep turns risky inspections into routine checks. Let’s gear up and get smart about protecting yourself—and your project.
Protective Gear and Best Practices
Your outfit matters more than fashion here. Think of it as armor against the unexpected.
| Gear | Purpose | Pro Tip |
| Steel-toe shoes | Crush protection | Avoid laces that drag on wet surfaces |
| Nitrile gloves | Chemical resistance | Double-layer for sharp debris |
| Long-sleeve clothes | Scratch prevention | Light colors show stains faster |
- Keep a phone or camera handy to snap photos from a safe distance
- Never lean into the container—use a grabber tool if needed
- Wash hands immediately after removing gloves
Steps to Prevent Future Damage
Smart habits today mean fewer headaches tomorrow. Schedule checks after heavy rain or extreme temperatures—metal expands and contracts like a moody teenager.
| Action | Benefit | Best Time |
| Line floors with plywood | Reduces floor stress | Before loading heavy items |
| Clear drainage areas | Prevents water buildup | After storms |
| Report issues promptly | Avoids liability disputes | Within 24 hours of discovery |
Mark problem areas with bright tape instead of chalk. It’s easier to spot and survives rain. Remember: Your rental company wants functional containers, too—team up for better results.
Wrapping Up Your Dumpster Inspection Process
Knowing how to spot dumpster wear transforms waste management from a potential liability into a seamless aspect of your construction or cleanout project. With just five minutes and a systematic approach, you can identify critical issues like compromised floors, damaged hinges, or structural weaknesses before they impact your timeline or safety. Remember to document any concerns with photos, communicate promptly with your rental provider, and distinguish between normal wear and serious damage requiring professional attention.
Prime Dumpster provides nationwide waste management solutions with well-maintained containers, serving projects from weekend cleanouts to commercial construction nationwide, with offices in Oklahoma City, Houston, Phoenix, and many locations throughout the United States. Contact our team to discover how our preventative maintenance program ensures you receive reliable equipment that meets your project’s demands without unexpected complications.
If you are looking for What Types of Dumpster Rentals are Near Me?, Click Here
Recent Posts


Follow Us test
Have any questions?
+1 844 853 3867
Give us a call today so we can help you find the right waste & sanitation solution for
your project!
Contact Us